
Before you can sync anything, you need to connect Microsoft Dynamics 365 to Xero
To begin with, log at https://connector.stellarise.com
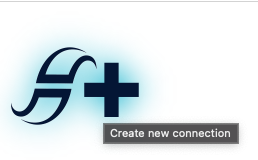
Create a Connection
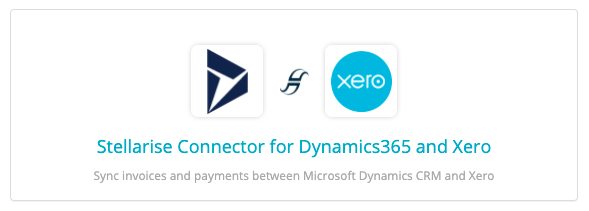
From the Stellarise Portal, click on "Create a New Connection". A drop-down menu will show up and you just need to click on the "New Stellarise Connector for Dynamics365 and Xero" badge.
Connect to Xero
This step allows the Connector to access your Xero information from the selected Xero Organisation.
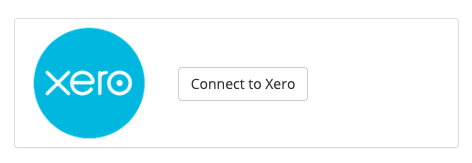
In the connection page, the first step is to connect to Xero and give permission for the connector to access your Xero Organisation data. The connector does not store any financial data coming from your Xero or Dynamics 365 instances, it just syncs this data between the two systems.
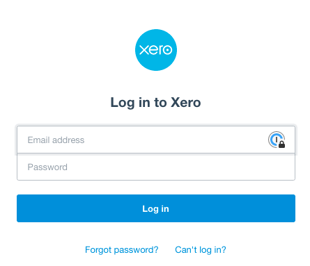
Click on “Connect to Xero” button to allow Stellarise Connector to access your Xero endpoint. You will be taken to the Xero login page, where you have to login to Xero with your credentials.
Once you have logged in, select the Organisation you want to synchronise and click on “Allow access”.
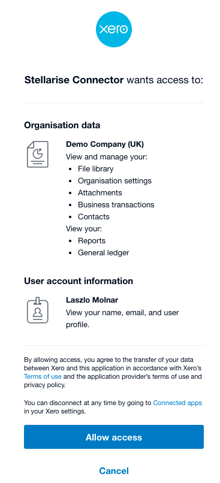

Once connected, you will see your Xero Organisation name and a green tick instead of the original “Connect to Xero” button.
Install the Solution
You need to install the managed solution into your Microsoft Dynamics 365 instance. You can do this in two ways; from Microsoft AppSource or by manually downloading and installing the solution.
Use the links as shown below on your connection page to get the latest solution:
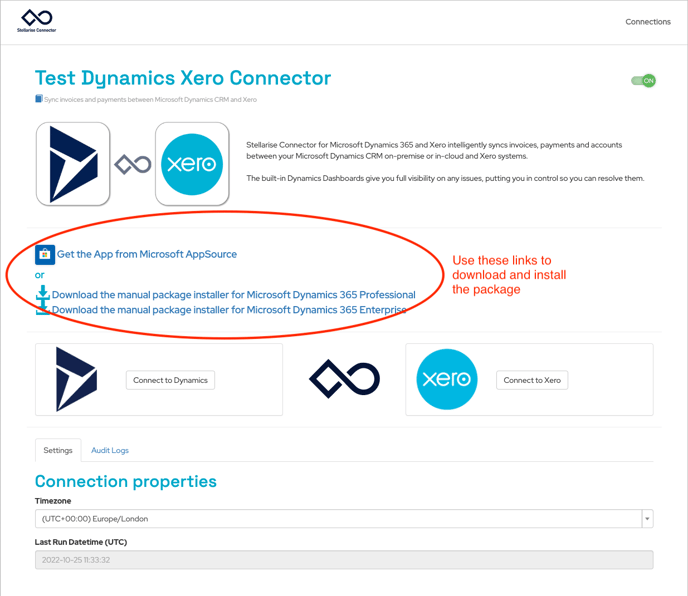
- Choose the right package installer for your version of Micrsoft Dynamics 365; Professional or Enterprise and download it.
- When you have downloaded this solution, install it into Dynamics 365. Don't unzip the solution prior to installation.
To do this, enter your Dynamics 365 Instance and go to Settings > Solutions as below: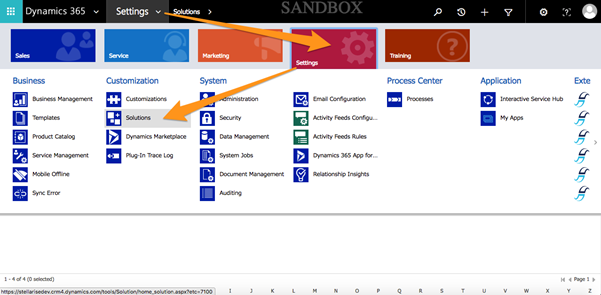
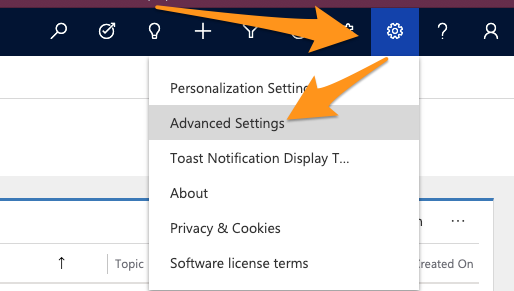
- In Unified Interface select Settings > Advanced Settings:
- A new window will open with the Settings area. Now you can select the Solutions.
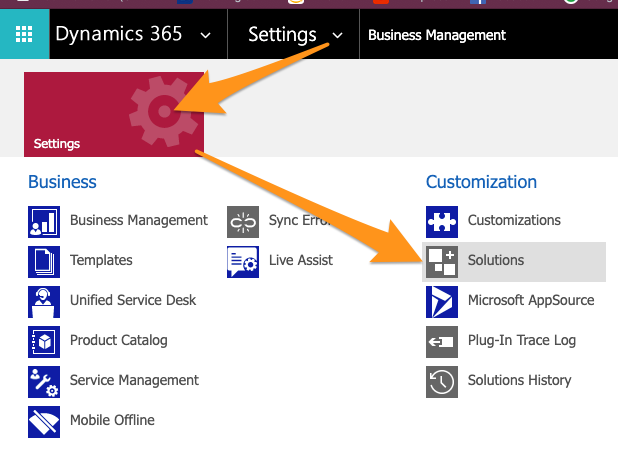
- Click on the ‘import solution’ button, select the downloaded .zip file and follow the installation flow provided by Dynamics365.
.png?width=601&name=image2019-7-15_13-57-15%20(1).png)
- Once the Stellarise Solution is installed into your Dynamics 365 instance, go back to the connection details page at https://connector.stellarise.com.
Connect to Dynamics 365
On your connection details page at https://connector.stellarise.com...
Click on the ‘Connect to Dynamics’ button and allow access to your Dynamics Organisation information (as per Xero):

Select your Dynamics Organisation from the list:
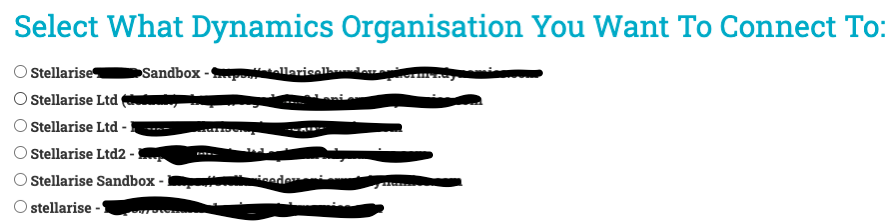
Once you have selected the Organisation from a list, if the connection is successful you will have a green tick by it.
Microsoft Dynamics 365 User Permissions
To be able to use Stellarise Connector for Dynamics 365 and Xero, the Dynamics user you connect with in the above steps must have the correct permissions; What permissions does the Microsoft Dynamics 365 user need? details these.
Set the Subscription Type, Connection Name and Timezone
As a last step, set the defaults for the connector's behaviour as below:
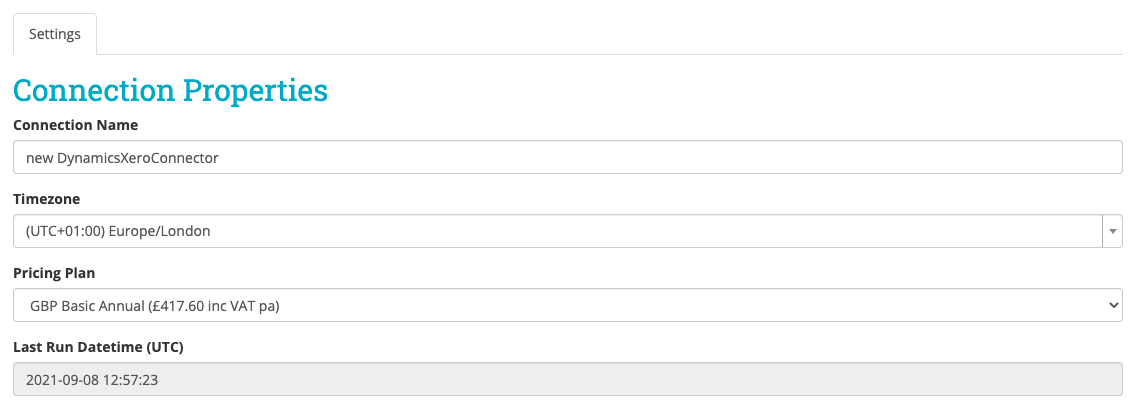
- Connection name: Set the name of your connection, this will be shown in Dynamics 365
- Subscription: Select the plan you prefer to run your Stellarise connector.
- Time zone: Should be set as the same timezone as your Dynamics 365 and Xero.
- Last Run Datetime (UTC): shows when your connector was successfully running last time.
Confirm the connection is working
Once you created your connection by connected to Xero and Dynamics 365 a Stellarise Connector record will be created in your Dynamics 365 with the related Stellarise Connector Settings record.
In the next 5-10 minutes your connector will run and creates the Chart of Accounts, Tax types and Branding Themes record from Xero into your Dynamics 365 instance.